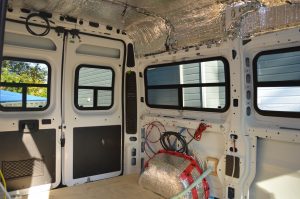
 Whether it’s from normal wear and tear, water leaks, or from naughty neighborhood kids throwing rocks, your RV windows would tend to get damaged from time to time. However, repairing RV windows tend to get expensive. It would save you a few bucks on labor costs if you can do it yourself. Here are some tips for successful RV window repair, in case you need to install a new window or reseal a leaking one:
1. Completely Remove Old Seals
Remove old seals completely without leaving behind a bit of residue. You can’t just pull the old seal off the RV window frame and install a new one without making sure there is no debris left on the frame—or else, the new seal won’t stick properly.
Inspect any corner or surface of the exterior metal or fiberglass and the window frame itself. You can use a metal or plastic scraper then wipe it with a clean wet cloth or alcohol-based cleaning materials to remove any stubborn residue. Just make sure to dry it off properly afterwards.
2. Use Proper Seal
Using any cheap sealant from the hardware store sounds good for your budget. But would it be good for your window? Disregarding the question if it is easy to mold, cheap sealants can crack easily due to hot weather, and peel in humid conditions.
Look for the specific seal for your RV window at an RV specialty outlet. You can also consider using special seals; these are those that are water-resistant and or can endure all weather conditions. They are pricier, but they can greatly increase the life of your RV window and reduce the frequency of repair.
3. Make Sure the Drain Holes are at the Bottom
When you’re not paying attention during your RV window repair, it is easy to make a mistake by mounting your windows upside down. This is because the upper and lower parts look so similar that it is so easy to mix it up. It’s just that, the bottom part of the window usually have small holes called weep holes or drain holes.
Whether it’s a camper trailer window or van window you plan on replacing, make sure you install your RV window with the drain holes are at the bottom. These holes allow condensation due to cold weather to drain before they turn into puddles. If the holes are on the upper part, the water will run down inside the window.
4. Don’t Immediately Tighten or Over-tighten the Screw
Have a person hold the window from the outside while you start putting in the screws. Do not tighten the screws at one side while you haven’t installed the screws on the opposite side. Instead, put the screws loosely on all the holes in the entire frame before slowly working around to tighten them up.
Don’t over-tighten the screws. Give it enough room to shift while your vehicle is moving or your window might get damaged from too much pressure.
5. Do Not Skimp on the Caulking
Use the right caulk that best suits the material of your RV. If possible, ask for suggestions from your trusted RV specialty store. Also, make sure to apply them properly on top of the window frame and around the edges to keep it airtight and watertight. Better quality caulking can save you hefty repair costs in the long run.
With carefulness and patience, it’s not very difficult to do your own RV window repair. Following the above tips would surely boost the chances of your success. But if you are still uncomfortable working on your own RV window, you can have it done by a professional in an RV service facility.
